Application Lab Guide to Lab Ultrasonic Cleaner: Uses, Limits, and Liquids
Author: ZoeyDate: 2026-02-04Read: 6min
Abstract: This application lab guide explains how to use a Lab Ultrasonic Cleaner safely and effectively in modern laboratories. You’ll learn what ultrasonic cleaning is used for in laboratory workflows, what cannot be cleaned in an ultrasonic cleaner, what liquid to put in an ultrasonic cleaner (including lab ultrasonic cleaner solutions), and how to choose the best laboratory ultrasonic cleaner. To support compliance-minded teams, the guide also connects ultrasonic cleaning to controlled SOPs, documentation, and quality systems (ISO/TQM-style). A product spotlight section includes real specifications from a GT SONIC laboratory ultrasonic cleaner model used for application lab scenarios.
Why a Lab Ultrasonic Cleaner Is Essential in Modern Laboratories
In analytical, research, and production environments, cleaning is not a cosmetic task—it is a reliability task. Residues left on glassware, fixtures, holders, or lab components can introduce cross-contamination, bias results, degrade instruments, or trigger costly rework. A Lab Ultrasonic Cleaner (also searched as laboratory ultrasonic cleaner, ultrasonic cleaner laboratory, or laboratory ultrasonic cleaning machine) uses controlled cavitation to remove soils from crevices that brushes and rinses can miss. This improves repeatability and supports data integrity.
For regulated or quality-managed environments, cleaning must be performed at appropriate intervals, with written procedures and records. In pharmaceutical and GMP-adjacent settings, 21 CFR 211.67 emphasizes that equipment and utensils should be cleaned and maintained to prevent contamination that could affect product quality. (Reference: 21 CFR 211.67 and FDA inspection guidance on cleaning validation.)
Role of ultrasonic cleaning in analytical, research, and production labs
Ultrasonic cleaning is widely used to remove particulate soils, oils, polishing compounds, salts, flux residues, and biological films from hard surfaces. In an application lab, a laboratory ultrasonic cleaner often sits between “use” and “next-use,” serving as a controlled, repeatable cleaning step. This is especially useful for shared equipment (multi-user labs), high-throughput testing, and sample prep workflows that demand consistent baselines.
Alignment with ISO/TQM-style quality systems and controlled lab workflows
A professional lab cleaning program mirrors quality systems thinking: define an SOP, control inputs (liquid chemistry, temperature, cycle time), verify outputs (visual check, conductivity/rinse check, residue test when needed), and keep records. This approach aligns with ISO/TQM concepts such as process control, corrective actions, and traceability—helpful when labs support manufacturing, supplier QA, or customer complaint investigations.
How ultrasonic cleaning supports repeatability, contamination control, and documentation
Compared with manual scrubbing, ultrasonic cleaning reduces operator variability. The same cycle parameters can be repeated shift-to-shift, making outcomes easier to validate. Documentation can include: item type, pre-check results, solution type, concentration, temperature, time, post-clean rinse method, and inspection result.
Application lab environments that rely on ultrasonic cleaning
Common application lab users include: chemical laboratories (glassware, sample holders), biomedical labs (instrument parts and non-critical components), electronics and materials labs (fixtures, small metal parts, PCB-related tools), academic labs (shared glassware turnover), and industrial labs supporting QA/QC. The best-fit use cases are those where you need consistent cleaning of complex geometries without aggressive abrasion.
What Is the Use of Ultrasonic Cleaner in Laboratory?
What is the use of ultrasonic cleaner in laboratory? In simple terms: to remove contamination from labware and components using cavitation energy in a liquid bath. A transducer generates high-frequency vibrations (often 40 kHz in general lab systems). Microscopic bubbles form and collapse near surfaces, creating tiny jets that lift soils from grooves, joints, and threaded areas.
Below are practical application lab examples where a lab ultrasonic bath improves cleaning efficiency and consistency.
Table – “Common Uses of a Lab Ultrasonic Cleaner”
Laboratory Area
Application
Benefit
Analytical lab
Glassware cleaning
Reduced cross-contamination
Biomedical lab
Instrument parts
Non-destructive cleaning
Electronics lab
PCB & components (when compatible)
Precision residue removal
Research lab
Sample prep fixtures & holders
Improved test accuracy
Application Lab Workflow: Ultrasonic Cleaning as a Controlled Process
In well-run labs, ultrasonic cleaning is not “random time in the tank.” It is a controlled process with decision points—similar to incoming inspection workflows used in manufacturing quality systems. A simple control structure reduces risk, makes training easier, and improves audit readiness.
Standard application lab cleaning workflow
Use this repeatable sequence to standardize outcomes and reduce rework:
1) Identify item and soil type (organic, inorganic, biofilm, flux, particulate). 2) Check compatibility (material, coatings, adhesives, labels). 3) Select lab ultrasonic cleaner solutions (DI water + detergent, enzymatic, or approved specialty). 4) Set parameters (power, time, temperature) and run ultrasonic cycle. 5) Rinse (DI water recommended for final rinse), then dry (lint-free air/oven as appropriate). 6) Inspect (visual, magnification, residue test if needed) and record results. 7) Release item back to service or escalate if contamination persists.
A quick decision gate is useful: PASS (clean), REWORK (repeat with adjusted parameters), or HOLD (investigate root cause—wrong chemistry, overloaded basket, degraded solution, incompatible item). This mirrors complaint/return management logic used in quality systems: verify, analyze, correct, and document.
What Liquid Do I Put in an lab ultrasonic bath?
What liquid do I put in an ultrasonic cleaner? The safest default in most laboratories is DI water with an appropriate laboratory detergent formulated for ultrasonic use. The correct liquid depends on the soil, the material being cleaned, and the safety requirements of your lab. Avoid unapproved, flammable, or reactive liquids unless your EHS program and equipment design explicitly support them.
Common lab ultrasonic cleaner solutions
Most labs standardize 2–4 solution types to cover common soils. The goal is to match chemistry to contamination while keeping validation manageable. Examples include neutral detergents (general labware), mild alkaline cleaners (stubborn oils/grease where material allows), enzymatic cleaners (protein residues), and specialty cleaners for specific industrial residues.
A lab safety supply ultrasonic cleaner program should address PPE, labeling, chemical compatibility, ventilation, waste disposal, and spill response. Key controls include: verifying tank material compatibility, limiting temperature to prevent excessive vapor, using lids during operation, and never mixing chemicals that could react. Maintain a simple log: solution type, concentration, change-out date, and operator initials.
Table – “Ultrasonic Cleaner Liquids for Laboratory Use”
Liquid Type
Suitable For
Notes
DI water
Light contamination
Often combined with detergent
Neutral lab detergent
General labware
Most common choice
Enzymatic solution
Protein residues
Biomedical labs
Approved specialty solutions
Stubborn residues
Follow supplier instructions
Solvents
Special residues
Use only with safety approval
Best practice: Degas a fresh bath for a few minutes before critical cleaning. Degassing improves cavitation consistency by removing dissolved gases that can dampen performance.
What Cannot Be Cleaned in an Ultrasonic Cleaner?
What cannot be cleaned in an ultrasonic cleaner? The short answer: items that can be damaged by vibration, cavitation, heat, or liquid exposure; and items that pose safety risks in a bath environment. Knowing limits is as important as knowing uses—especially in application labs where equipment varies widely.
Items generally unsuitable for ultrasonic cleaning
Common no-go categories include: • Fragile glassware with cracks or stressed joints (risk of breakage). • Items with loose coatings, flaking plating, or weak paint (cavitation can lift layers). • Components with sensitive adhesives, labels, or trapped cavities that retain liquid. • Certain electronics or assemblies not designed for immersion. • Highly reactive materials or items contaminated with incompatible hazards (follow EHS rules).
Risk management in ultrasonic cleaner laboratory use
Use a compatibility checklist before cleaning: material, coating, seal integrity, and whether the item can be fully rinsed and dried. When uncertainty exists, reduce risk with shorter cycles, lower power, cooler temperatures, and a test piece. If the contamination is hazardous or regulated, validate removal with an appropriate method (swab, rinse test, or analytical verification) and document the result.
Best Laboratory Ultrasonic Cleaner: How to Choose the Right System
Best laboratory ultrasonic cleaner selection is not one-size-fits-all. The right unit depends on your application lab throughput, typical item size, soil type, safety constraints, and documentation needs.
Key selection criteria for a laboratory ultrasonic cleaning machine
Evaluate these factors: • Tank size and usable basket area (real throughput). • Frequency (40 kHz is common for general lab cleaning; other frequencies may suit delicate or heavy-duty tasks). • Power control and stability (adjustable power supports delicate items and prevents over-cleaning). • Heater control and temperature range (improves detergent performance and repeatability). • Timer precision, degas mode, and user interface (SOP-friendly operation). • Drainage, filtration options, and maintenance access (reliable daily use). • Support, warranty, spare parts, and documentation from the manufacturer.
Matching cleaner capacity to lab workload
A small research lab may only need a compact bench unit for glassware and fixtures, while a production or QA lab may require a larger tank for batch cleaning. Over-sizing increases chemical consumption and warm-up time; under-sizing creates bottlenecks and inconsistent cleaning because staff overload the basket. Aim for a tank volume that fits your typical load with space for liquid circulation around each item.
Operational tip: Standardize one “default” cycle for your most common load, then define approved exceptions (delicate items, heavy soils, special chemistries).
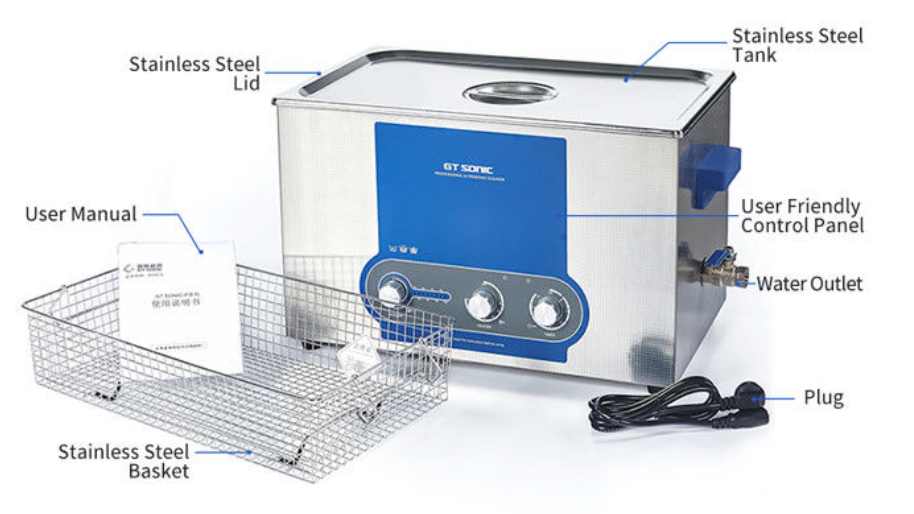
GT SONIC Ultrasonic Cleaner in Application Lab Scenarios
To make selection criteria concrete, here is a real-world example from a GT SONIC laboratory ultrasonic cleanerconfiguration used in many application lab contexts. The model highlighted is a power-adjustable unit designed for controlled cleaning and consistent performance.
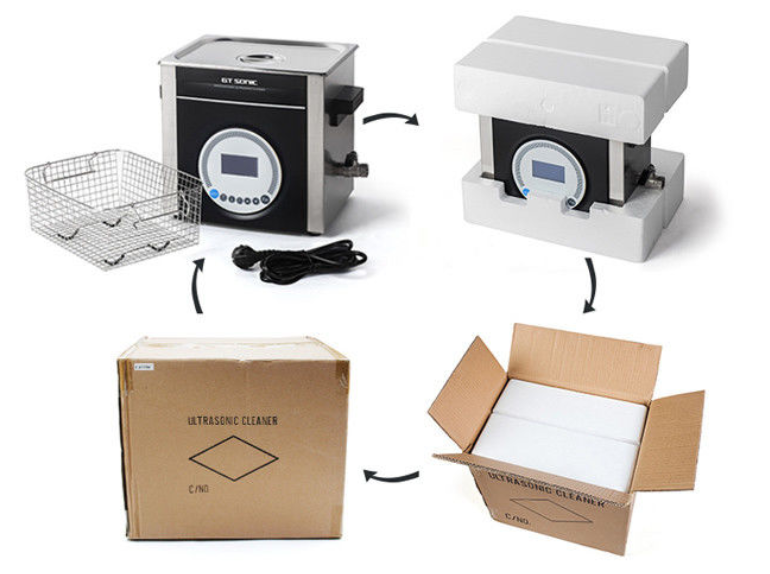
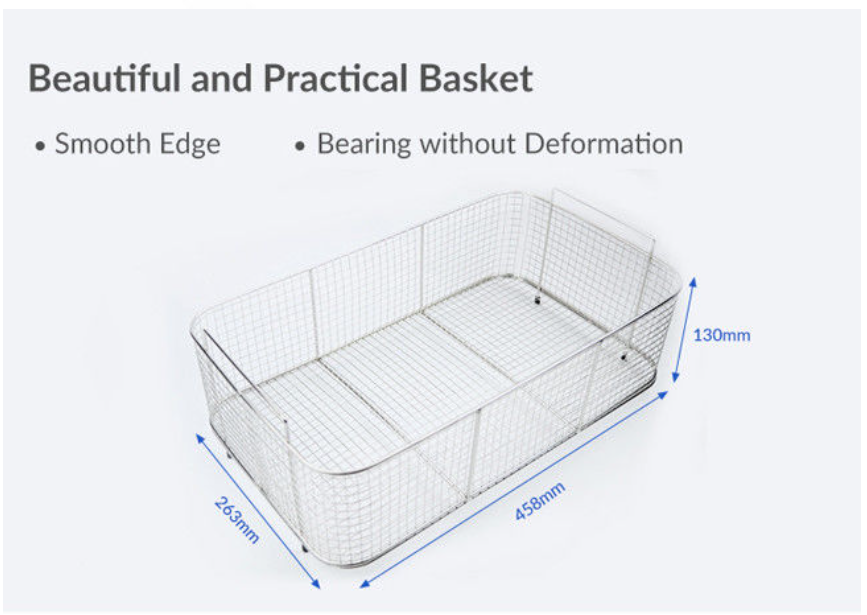
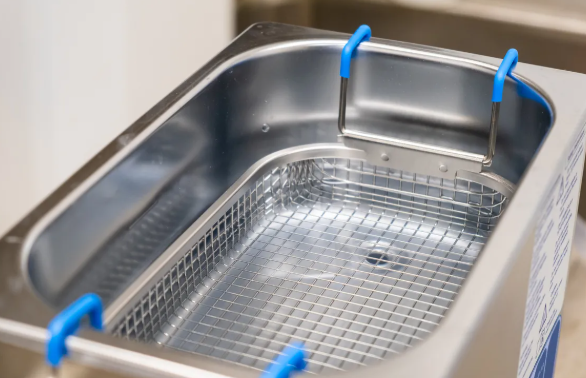
Key specifications (from the product information provided): • Brand: GT SONIC • Model: GT SONIC-P27 • Tank volume: 27 L • Ultrasonic frequency: 40 kHz • Power adjustment: 30% to 100% (optimized for different cleaning intensities) • Heating: 20–80 °C (typical lab heating range shown) • Timer: 0–30 minutes (common lab cycle control) • Design features: moisture-proof and anti-corrosion PCB; drainage and cooling fan on larger-volume models; ceramic heaters for improved effect • Commercial terms: MOQ 1 pc; price negotiable; packaging PE foam + carton; payment terms L/C, T/T
Where a 27L laboratory ultrasonic cleaner fits best
A 27L ultrasonic cleaner laboratory unit is well suited to batch workflows: multiple beakers and flasks, racks, stainless fixtures, sample holders, and medium-sized components. Power adjustment helps application labs standardize cleaning across diverse items—using lower power for delicate surfaces and higher power for heavy soils.
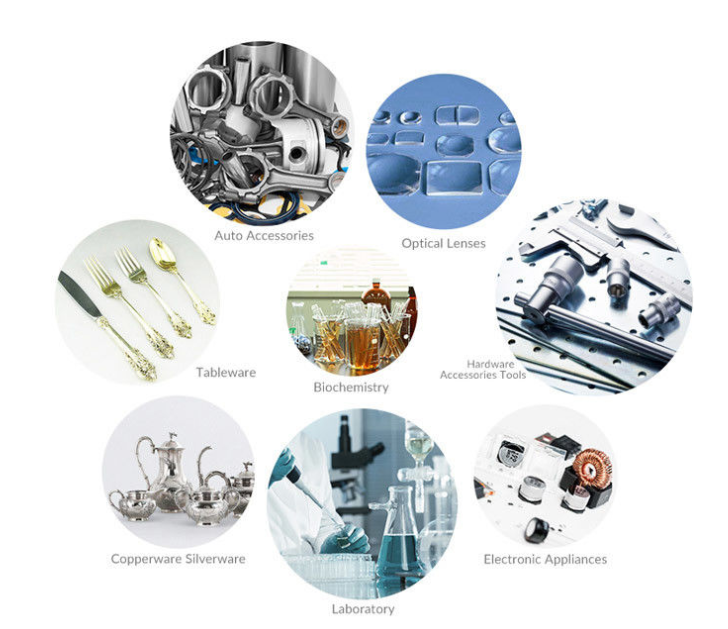
Typical application lab use cases listed for the series
The application list includes laboratory and cross-industry uses such as electronics, hardware, medical, chemical industry, automotive, and circuit board-related cleaning, as well as degassing, disinfection, and mixing tasks. In labs, this flexibility is valuable when one ultrasonic system supports multiple departments under a controlled SOP.
Conclusion
A Lab Ultrasonic Cleaner is a foundational tool in modern laboratories because it delivers repeatable, crevice-level cleaning with fewer operator variables. To use it well, treat ultrasonic cleaning as a controlled process: define compatible items, choose validated liquids, standardize time/temperature/power settings, and document outcomes. Understanding limits—what cannot be cleaned in an ultrasonic cleaner—protects both equipment and results. Finally, selecting the best laboratory ultrasonic cleaner means matching tank size, frequency, power control, heater capability, and support to your application lab workload. A power-adjustable example such as the GT SONIC-P27 (27L, 40 kHz) illustrates how real product features can align with SOP-driven laboratory cleaning requirements.
References (for compliance-minded teams): • 21 CFR 211.67 (Equipment cleaning and maintenance) • FDA Guide to Inspections: Validation of Cleaning Processes (7/93, updated posting)