How to Clean Lab Glassware with a Laboratory Ultrasonic Cleaner?
Author: Zoey
Date: 2026-05-15
Read: 6min
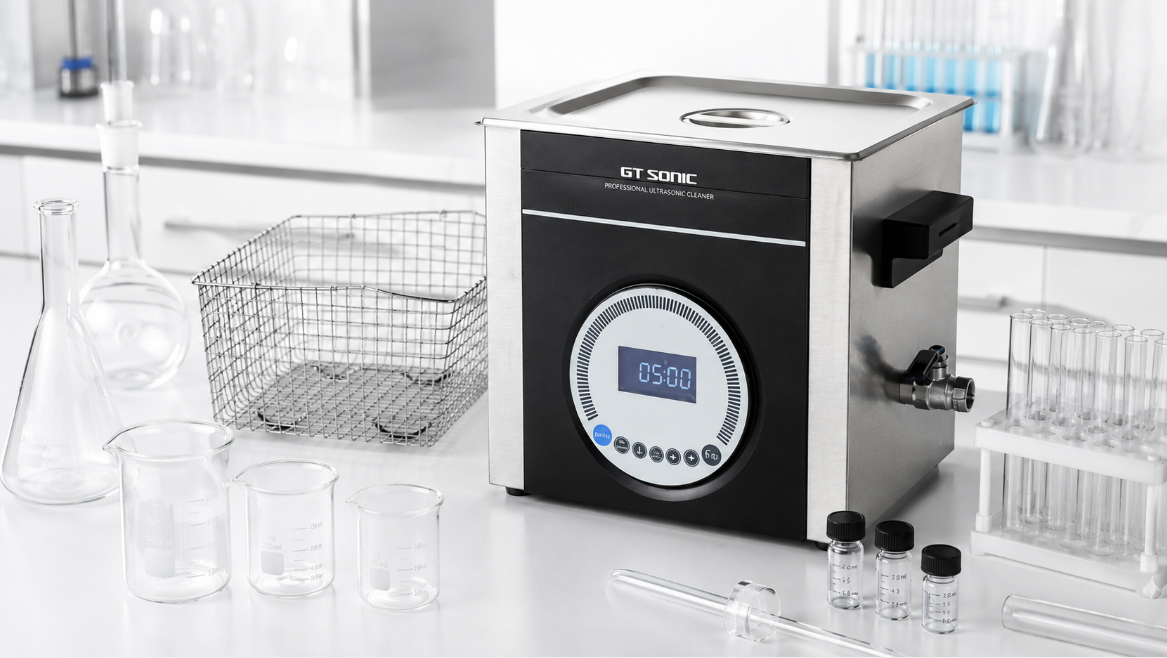
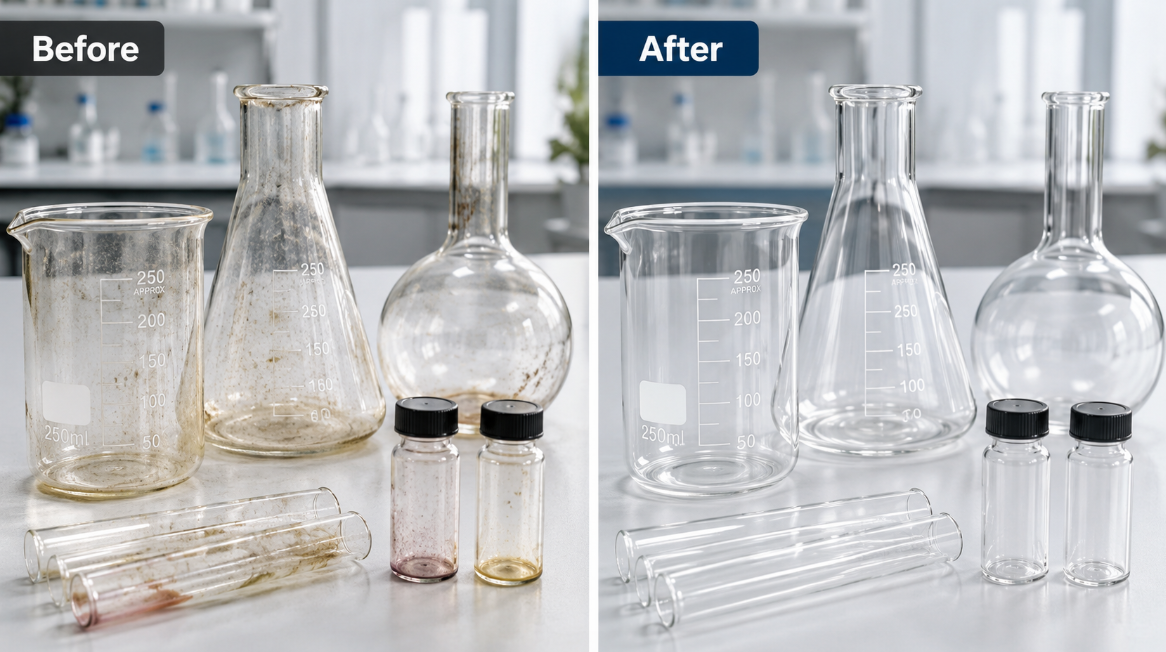
A laboratory ultrasonic cleaner helps clean lab glassware more consistently by using ultrasonic cavitation to remove residues from surfaces, corners, inner walls, and narrow openings. For laboratories that frequently clean beakers, flasks, test tubes, cuvettes, and sample vials, an ultrasonic cleaner for lab glassware can reduce manual brushing and support a more repeatable cleaning workflow.
However, ultrasonic cleaning is not only about placing glassware in water and pressing start. To get reliable cleaning results, laboratories need the right ultrasonic cleaning machine, suitable cleaning solution, correct loading method, proper time and temperature settings, and a clear rinsing and drying process.
This guide explains how to clean laboratory glassware with a lab ultrasonic cleaner, including SOP steps, recommended settings, common mistakes, and best practices for daily laboratory use.
Why Use an Ultrasonic Cleaner for Lab Glassware?
An ultrasonic cleaner is useful for lab glassware because it can reach areas that manual cleaning often misses. Ultrasonic cavitation creates microscopic bubbles in the cleaning liquid, and when these bubbles collapse, they help loosen particles, stains, oils, chemical residues, and other deposits from the glass surface.
Ultrasonic Cavitation Helps Clean Hard-to-Reach Areas
Ultrasonic cavitation is effective because the cleaning action occurs throughout the liquid, not only where a brush can touch. This makes a laboratory ultrasonic cleaner especially helpful for narrow-neck flasks, deep beakers, test tubes, sample vials, and other glassware with inner corners or curved surfaces.
Lab Ultrasonic Cleaning Reduces Manual Brushing
Lab ultrasonic cleaning reduces manual brushing by allowing cavitation and cleaning solution to work together. This can help lower the risk of glass breakage, operator fatigue, and inconsistent cleaning results caused by different manual washing habits.
A Digital Ultrasonic Cleaner Supports Repeatable Cleaning
A digital ultrasonic cleaner supports repeatable cleaning because time and temperature can be set more accurately. For labs that clean glassware every day, repeatable settings are useful for creating a standard operating procedure instead of relying on guesswork.
What Types of Lab Glassware Can Be Cleaned in an Ultrasonic Cleaner?
Most common lab glassware can be cleaned in an ultrasonic cleaner when the glassware is intact, compatible with the cleaning solution, and suitable for immersion. Typical items include beakers, flasks, test tubes, sample vials, cuvettes, and some glass accessories.
Beakers, Flasks, and Test Tubes
Beakers, flasks, and test tubes are commonly cleaned in an ultrasonic cleaning bath because they often hold chemical residues, powders, salts, oils, or dried sample deposits. Pre-rinsing is recommended before ultrasonic cleaning, especially when visible residue remains inside the glassware.
Cuvettes and Sample Vials
Cuvettes and sample vials can often be cleaned with an ultrasonic bath, but they should be handled carefully. Some cuvettes are made from glass, quartz, or plastic, so the cleaning solution, temperature, and cleaning time must be selected based on material compatibility.
Calibrated and Delicate Glassware
Calibrated or delicate glassware should be cleaned according to the lab’s internal SOP. Volumetric flasks, graduated pipettes, and precision glass tools may require gentler conditions because harsh chemicals, long cycles, or high temperatures may affect markings, coatings, or calibration confidence.
|
Lab Glassware
|
Common Residues
|
Ultrasonic Cleaning Notes
|
|
Beakers
|
Chemical residue, powders, light oils
|
Use a basket and avoid tank-bottom contact.
|
|
Flasks
|
Stains, salts, organic residues
|
Pre-rinse narrow-neck flasks before cleaning.
|
|
Test tubes
|
Sample residue, precipitates
|
Use a rack or holder when possible.
|
|
Cuvettes
|
Fingerprints, sample films
|
Check material compatibility first.
|
|
Sample vials
|
Solvent residue, small particles
|
Remove caps before ultrasonic cleaning.
|
Step-by-Step SOP for Ultrasonic Cleaning Laboratory Glassware
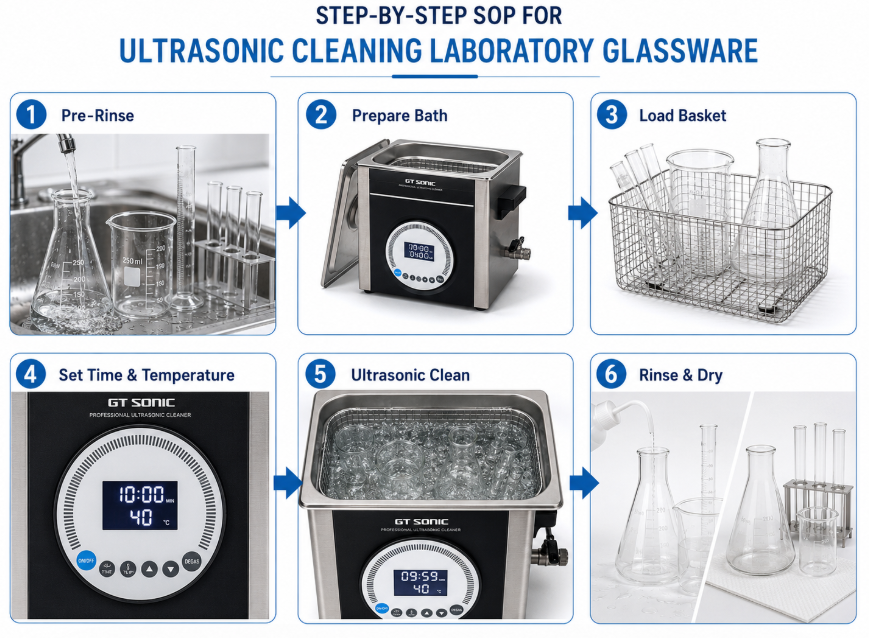
A clear SOP helps make ultrasonic cleaning laboratory glassware safer, more consistent, and easier to repeat. The process should include pre-rinsing, tank preparation, correct loading, controlled cleaning settings, rinsing, drying, and final inspection.
Step 1: Pre-Rinse the Lab Glassware
Pre-rinsing removes loose residue before the ultrasonic cleaning cycle begins. This step keeps the ultrasonic cleaning bath cleaner for longer and helps the ultrasonic cleaner machine focus on remaining surface contamination.
Step 2: Prepare the Laboratory Ultrasonic Bath
The laboratory ultrasonic bath should be filled to the recommended liquid level before operation. Running the machine with too little liquid may reduce cleaning performance and may also create unnecessary stress on the equipment.
Step 3: Add a Suitable Ultrasonic Cleaning Solution
A suitable ultrasonic cleaning solution should be selected according to the residue type and glassware material. Water may be enough for light particles, but oils, dried residues, proteins, and chemical films usually require a compatible cleaner solution.
Step 4: Place Glassware in a Basket or Holder
Glassware should be placed in a basket, tray, or holder instead of directly on the tank bottom. This improves liquid circulation, protects the stainless steel tank, and reduces the risk of glassware damage during the ultrasonic cleaning process.
Step 5: Set Cleaning Time and Temperature
Cleaning time and temperature should match the residue level, cleaning solution, and glassware type. A digital ultrasonic cleaner is helpful because it allows the operator to set the same cleaning time and temperature for repeatable lab workflows.
Step 6: Rinse, Dry, and Inspect
Rinsing, drying, and inspection complete the cleaning process after the ultrasonic cycle. DI water is often preferred for final rinsing, especially in analytical, pharmaceutical, chemical, and research laboratories where water spots or solution residues may affect later use.
Recommended Ultrasonic Cleaning Time and Temperature for Lab Glassware
The recommended ultrasonic cleaning time and temperature depend on residue type, glassware condition, and cleaning solution compatibility. Light residues may need only a few minutes, while oily or dried residues may require a longer cycle or a heated ultrasonic cleaner.
Suggested Cleaning Settings by Residue Level
|
Residue Level
|
Suggested Time
|
Suggested Temperature
|
Cleaning Notes
|
|
Light dust or particles
|
3–5 minutes
|
Room temperature
|
Suitable for routine rinsed glassware.
|
|
General chemical residue
|
5–10 minutes
|
30–45°C
|
Use a compatible ultrasonic cleaner solution.
|
|
Oil or greasy residue
|
10–15 minutes
|
40–60°C
|
A heated ultrasonic cleaner may improve results.
|
|
Dried or stubborn residue
|
10–20 minutes
|
Depends on solution
|
Pre-soaking may be helpful.
|
|
Sensitive glassware
|
Short cycle
|
Low or room temperature
|
Avoid unnecessary heat or long exposure.
|
When Shorter Cleaning Cycles Are Better?
Shorter cleaning cycles are better when glassware is delicate, lightly contaminated, or used in sensitive analytical work. Over-cleaning does not always improve results and may increase the risk of glassware wear, surface stress, or unnecessary energy use.
When Longer Cleaning Cycles May Be Needed?
Longer cleaning cycles may be needed for dried residues, oily films, or complex glassware shapes. If cleaning results are still poor after a normal cycle, it is often better to adjust the ultrasonic cleaning solution or pre-soak the item rather than simply extending the time too much.
Choosing the Right Ultrasonic Cleaning Solution for Glassware Residues
The right ultrasonic cleaning solution improves cleaning efficiency by matching the cleaner to the residue type. Water alone can remove loose particles, but many laboratory residues need a mild alkaline, neutral, acidic, or specialty lab-approved cleaner.
Cleaning Solution by Residue Type
|
Residue Type
|
Recommended Cleaning Approach
|
|
Dust and loose particles
|
Water or mild cleaning solution
|
|
Water-soluble salts
|
Water-based solution plus DI water rinse
|
|
Oils and grease
|
Mild alkaline ultrasonic cleaner solution
|
|
Organic residue
|
Compatible lab cleaning solution
|
|
Protein-based residue
|
Enzymatic or lab-approved cleaner when suitable
|
|
Mineral deposits
|
Acidic cleaner only if compatible with glassware
|
DI Water vs Tap Water in an Ultrasonic Cleaning Bath
DI water is often better for final rinsing because it reduces mineral spots and waterborne contamination. Tap water may be acceptable for initial cleaning in some labs, but DI water is preferred when glassware must be clean enough for analytical, chemical, or research use.
Avoid Random Chemicals in the Ultrasonic Tank
Random chemicals should not be poured into an ultrasonic tank without compatibility checks. Strong acids, strong alkalis, flammable solvents, and unknown mixtures may damage the tank, create safety risks, or leave residues on laboratory glassware.
Why You Should Use a Basket in a Laboratory Ultrasonic Bath?

A basket is important because it protects the glassware and allows ultrasonic energy to work more evenly. Placing glassware directly on the bottom of the tank can reduce cleaning efficiency, scratch the tank, and increase the risk of breakage.
A Basket Improves Cleaning Liquid Circulation
A basket improves circulation by keeping glassware suspended in the cleaning liquid. This allows cavitation and ultrasonic cleaning solution to reach more surfaces, including the sides, inner walls, and bottom areas of the glassware.
A Basket Helps Protect the Ultrasonic Cleaning Machine
A basket helps protect the ultrasonic cleaning machine by preventing glassware from rubbing against the stainless steel tank. This is especially important for laboratories that clean multiple batches of beakers, test tubes, and flasks every day.
Holders Are Useful for Small Glassware
Holders are useful for small glassware such as cuvettes, sample vials, and test tubes. They help keep items upright, separated, and easier to remove after the ultrasonic cleaning cycle.
Common Mistakes When Cleaning Lab Glassware in an Ultrasonic Cleaning Machine
Most cleaning failures happen because of poor loading, unsuitable cleaning solution, incorrect time settings, or skipped rinsing. Avoiding these common mistakes helps improve cleaning results and extends the service life of the laboratory ultrasonic cleaner.
Mistake 1: Placing Glassware Directly on the Tank Bottom
Glassware should not be placed directly on the tank bottom because it can block ultrasonic energy and increase damage risk. Always use a basket, tray, or holder designed for ultrasonic cleaning.
Mistake 2: Overloading the Ultrasonic Cleaning Bath
Overloading the ultrasonic cleaning bath reduces cleaning performance because liquid cannot move freely between items. If the glassware is too crowded, cavitation cannot reach all surfaces effectively.
Mistake 3: Using the Wrong Cleaner Solution
Using the wrong cleaner solution can leave residue, fail to remove contamination, or damage sensitive materials. The best ultrasonic cleaner solution for glassware depends on the residue, material, temperature, and lab requirements.
Mistake 4: Skipping the Final Rinse
Skipping the final rinse may leave cleaning solution or loosened particles on the glassware. For laboratory use, a DI water rinse is often recommended before drying and storage.
Mistake 5: Assuming Longer Cleaning Is Always Better
Longer cleaning is not always better because excessive ultrasonic exposure may not improve cleaning results. A better approach is to adjust the cleaning solution, temperature, loading method, or pre-soaking process.
When to Use a Heated Ultrasonic Cleaner for Laboratory Glassware?
A heated ultrasonic cleaner is useful when warmth improves cleaning solution performance and helps remove oily, greasy, or stubborn residues. Heat can reduce surface tension and make some residues easier to loosen from glass surfaces.
Heated Ultrasonic Cleaning for Oils and Grease
Heated ultrasonic cleaning is often effective for oils, grease, wax-like films, and some dried residues. In these cases, a GT SONIC laboratory ultrasonic cleaner with heating and timer control can support more consistent routine glassware cleaning.
When Heat Should Be Avoided?
Heat should be avoided when the residue, glassware, label, coating, or laboratory method is temperature-sensitive. Some protein residues may become harder to remove if exposed to high heat, and some precision items may require lower-temperature cleaning.
Temperature Control Supports Better SOP Consistency
Temperature control supports better SOP consistency because the same cleaning conditions can be repeated across different batches. A digital ultrasonic cleaner with heating control is useful when the lab needs stable and documented cleaning parameters.
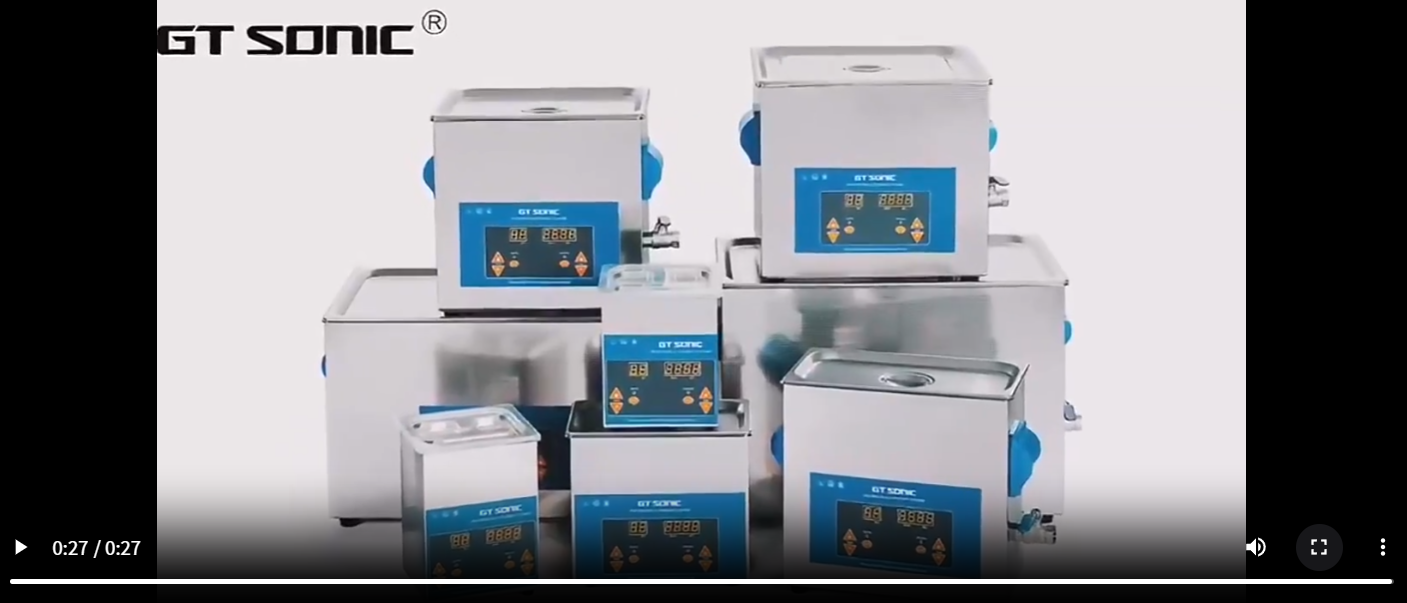
Suggested Video Block
Product Demo: GT SONIC Professional Ultrasonic Cleaner with Heater and Timer
Video: https://manuals.plus/video/85b7a4ce70d3d81b9369b710bae1a2a75175db2d68fc09abe8ade15622ae3a5a
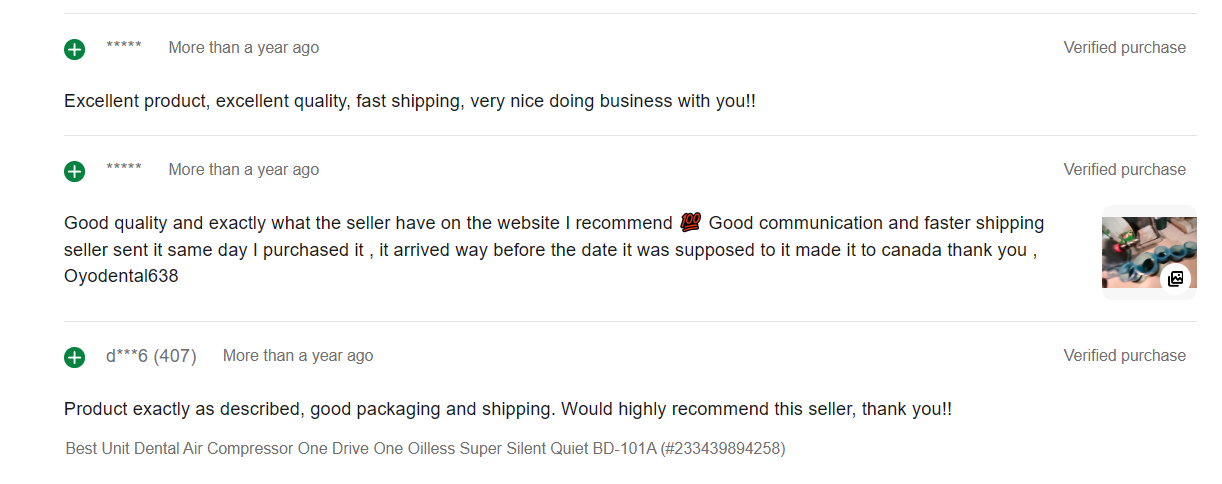
GT SONIC Ultrasonic Cleaner Customer Feedback
Customer feedback can help buyers understand not only product quality, but also service reliability, packaging, shipping, and communication. For laboratories choosing an ultrasonic cleaner machine for routine glassware cleaning, these factors are also important because equipment support and delivery reliability can affect daily lab workflows.
Recent shopping platform feedback for GT SONIC and related equipment highlights several points:
How to Rinse, Dry, and Inspect Glassware After Ultrasonic Cleaning?
Rinsing, drying, and inspection are necessary because ultrasonic cleaning is only one part of the complete glassware cleaning process. Even after visible residue is removed, remaining cleaning solution or loosened particles may still need to be rinsed away.
Rinse with Clean Water or DI Water
Rinsing with clean water or DI water removes remaining cleaning solution from the glass surface. DI water is especially useful for labs that need to reduce water spots, mineral residue, or contamination before the next experiment.
Dry According to Laboratory SOP
Drying should follow the lab’s SOP and the intended use of the glassware. Air drying may be enough for routine applications, while oven drying, filtered drying, or controlled drying may be needed for specific analytical or research workflows.
Inspect Before Storage or Reuse
Inspection should confirm that the glassware is visibly clean, undamaged, and ready for reuse. Check for stains, cloudiness, particles, cracks, chips, and any remaining residue before returning the glassware to storage.
FAQ About Ultrasonic Cleaner for Lab Glassware
1.Can I Clean Lab Glassware in an Ultrasonic Cleaner?
Yes, most common lab glassware can be cleaned in an ultrasonic cleaner if it is compatible with immersion, ultrasonic action, temperature, and cleaning solution. Damaged or highly delicate glassware should be checked before cleaning.
2.How Long Should I Ultrasonic Clean Laboratory Glassware?
Most routine laboratory glassware can be cleaned for about 5–15 minutes depending on the residue level. Light dust may need less time, while oily or dried residues may require a longer cycle or pre-soaking.
3.What Temperature Is Best for Ultrasonic Cleaning Lab Glassware?
The best temperature depends on residue type and cleaning solution compatibility. Room temperature is often enough for light cleaning, while 30–60°C may help remove oils and general residues when suitable.
4.Do I Need DI Water After Ultrasonic Cleaning?
Yes, DI water is recommended when the glassware must be free from mineral spots, tap water contaminants, or cleaning solution residue. This is especially important in analytical, research, pharmaceutical, and chemical laboratories.
5.Can Ultrasonic Cleaning Remove Chemical Residues from Glassware?
Yes, ultrasonic cleaning can remove many chemical residues when the correct cleaning solution, cleaning time, temperature, and rinsing process are used. Hazardous or reactive residues must be handled according to lab safety procedures before cleaning.
6.Can I Use a GT SONIC Ultrasonic Cleaner for Lab Glassware?
Yes, a GT SONIC ultrasonic cleaner for lab glassware can be used for routine cleaning when paired with a suitable basket, cleaning solution, time setting, and rinsing workflow. The right model should be selected based on tank size, workload, glassware type, and cleaning requirements.
Conclusion
A laboratory ultrasonic cleaner can improve lab glassware cleaning when it is used as part of a clear and repeatable SOP. The key steps are pre-rinsing, selecting a suitable ultrasonic cleaning solution, loading glassware correctly, controlling time and temperature, rinsing thoroughly, drying properly, and inspecting the final result.
For labs that regularly clean beakers, flasks, test tubes, cuvettes, and sample vials, a lab ultrasonic cleaner can reduce manual effort and improve cleaning consistency. With the right ultrasonic cleaning bath, basket, cleaning solution, and workflow, ultrasonic cleaning becomes a reliable part of daily laboratory glassware care.


