How to Use Ultrasonic Cleaner Dental: A Guide for Dental Practices with GT Ultrasonic Cleaner
Author: Zoey
Date: 2025-11-17
Read: 6min
In the fast-paced environment of modern dental practices, efficiency and hygiene are paramount. Ultrasonic cleaners have revolutionized the way dental tools are cleaned, offering a level of thoroughness and precision that manual cleaning methods can't match. This guide will cover everything dental professionals need to know about using ultrasonic cleaners, specifically focusing on the GT Ultrasonic Cleaner—including the highly efficient GT-F6 model—and how it can optimize your dental practice.
What is ultrasonic dental cleaning?
-How does dental ultrasonic cleaner work?
-Why is an ultrasonic cleaner important in healthcare?
How to use ultrasonic cleaner for dental instruments : step-by-step guide
-What not to put in an ultrasonic cleaner dental?
-How long to run ultrasonic cleaner for dental instruments?
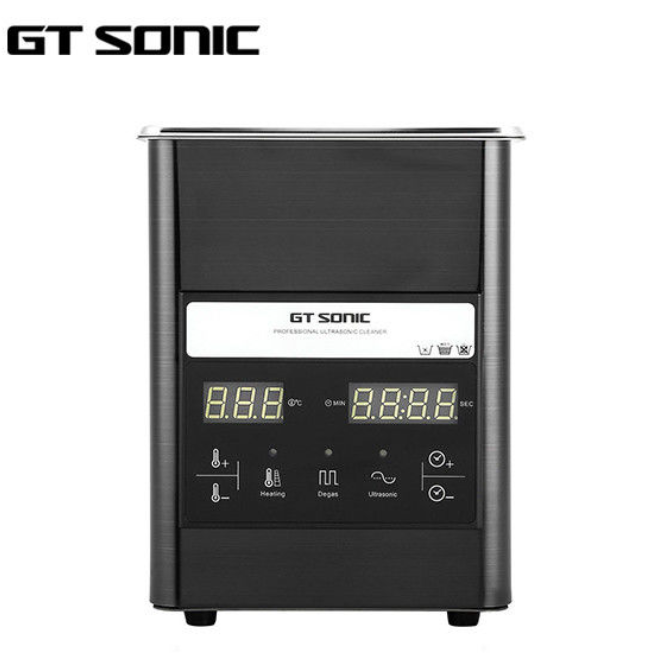
Key features of GT-F6 ultrasonic cleaner for dental practices
-Detailed information on the GT-F6 ultrasonic cleaner dental equipment
-Product description of ultrasonic dental cleaning machine
What is the benefit of using an ultrasonic cleaner for dental instruments?
How do you maintain an ultrasonic cleaner?
-What is the maintenance of ultrasonic scalers?
-How often should the water be drained from a dental ultrasonic cleaner?
-How often should you change the ultrasonic cleaner?
Common issues and troubleshooting of ultrasonic dental cleaner
-How to validate an ultrasonic cleaner?
-How do I unclog an ultrasonic cleaner?
-How to make ultrasonic cleaner work better?
What is Ultrasonic Dental Cleaning?
How does dental ultrasonic cleaner work?
An ultrasonic dental cleaner operates through high-frequency sound waves—usually between 20 kHz and 40 kHz—that are transmitted through a liquid medium. This creates millions of tiny bubbles, known as cavitation, which implode on contact with surfaces, creating a scrubbing action that effectively removes debris, bacteria, and other contaminants from dental instruments.
These ultrasonic waves generate enough force to clean even the most delicate dental tools without damaging them. The process is extremely thorough and can clean all parts of the instruments, including hard-to-reach areas that manual cleaning often misses.
Why is an ultrasonic cleaner important in healthcare?
In healthcare, particularly in dentistry, maintaining a high standard of hygiene is critical for patient safety. Ultrasonic cleaners ensure that dental instruments are free of harmful bacteria, viruses, blood, and other contaminants. This level of cleanliness is essential not only for patient health but also for the longevity of dental tools.
Moreover, ultrasonic cleaning helps to reduce the risk of cross-contamination, making it a safer alternative to manual cleaning. It also saves time by automating the cleaning process, allowing dental staff to focus more on patient care rather than cleaning tasks.
How to Use Ultrasonic Cleaner for Dental Instruments: Step-by-Step Guide
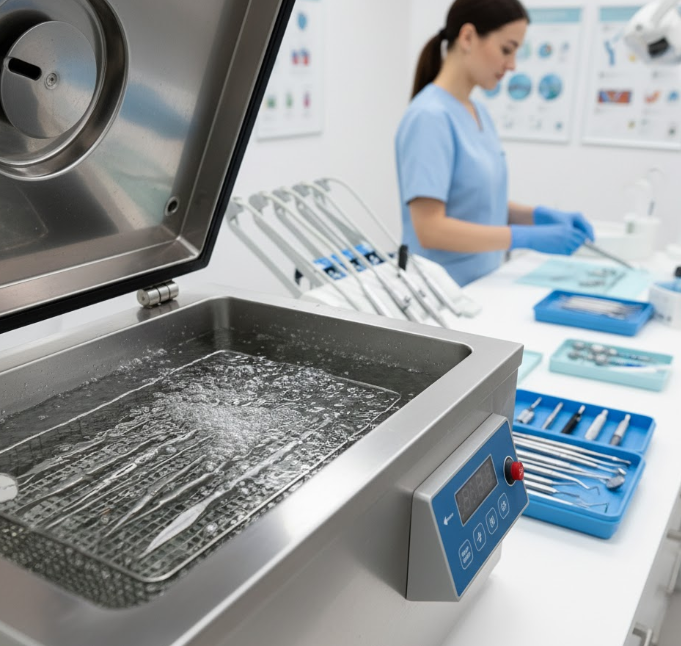
Using an ultrasonic cleaner for dental tools is a straightforward process. However, to get the best results, it’s essential to follow the right steps and use the correct settings. Here is a step-by-step guide for effectively using the ultrasonic cleaner:
Step 1: Prepare the Instruments
Before placing your dental instruments in the ultrasonic cleaner, remove any large debris or particles. You can do this by manually rinsing or wiping off the instruments. For items like dental mirrors or probes, make sure they are free from any visible buildup that could interfere with the cleaning process.
Step 2: Fill the Tank with Cleaning Solution
Pour an appropriate ultrasonic cleaning solution into the cleaner’s tank. There are specialized cleaning solutions available for dental tools, which are designed to remove organic matter and sterilize instruments. You can also use distilled water with a mild detergent, though a dedicated cleaning solution is often more effective.
Step 3: Set the Right Settings
Set the temperature and time on the ultrasonic cleaner. The temperature should generally be between 30°C and 50°C (86°F to 122°F), depending on the type of instrument and the level of contamination. Most ultrasonic cleaning cycles last between 3 to 10 minutes.
For lighter cleaning, a short cycle of 3-5 minutes is typically sufficient, while heavily soiled instruments may require longer exposure.
Step 4: Place Instruments in the Cleaner
Place the instruments into the ultrasonic cleaner’s basket, ensuring they are fully submerged in the cleaning solution. Do not overcrowd the basket—leave enough space for the ultrasonic waves to circulate around each instrument for optimal cleaning. If necessary, place smaller tools into mesh trays or pouches to avoid damage.
Step 5: Start the Cleaner
Activate the ultrasonic cleaner and allow it to run through the cleaning cycle. During this time, the ultrasonic waves will break down and dislodge debris from the instruments. The sound waves will also sterilize the tools to a certain degree, providing an added layer of protection for patients.
Step 6: Remove, Rinse, and Dry
After the cleaning cycle is complete, carefully remove the instruments from the ultrasonic cleaner. Rinse them with clean water to remove any remaining solution, and then dry them thoroughly using a clean cloth or air dryer. If necessary, sterilize the instruments using an autoclave.
What Not to Put in an Ultrasonic Cleaner Dental?
While ultrasonic cleaners are highly effective, there are certain items that should not be placed in the machine due to potential damage. Here are some things to avoid:
1.Electronic devices: Items like handpieces or electronic tools should never be placed in an ultrasonic cleaner as the cavitation could damage the electrical components.
2.Plastic tools: Some plastic dental tools can warp or degrade under the ultrasonic waves, particularly if exposed to high temperatures.
3.Sensitive materials: Items such as certain metals or precious stones (e.g., gold-plated instruments or inlays) may not be suitable for ultrasonic cleaning if they are too delicate.
To ensure the longevity of both your tools and the ultrasonic cleaner, always check the manufacturer’s guidelines for which materials are safe for cleaning.
How Long to Run Ultrasonic Cleaner for Dental Instruments?
The optimal cleaning time for dental instruments generally ranges from 3 to 10 minutes, depending on the level of contamination. For regular, lightly soiled tools, a shorter cycle of around 3-5 minutes should suffice. Heavily soiled tools may require a longer cycle, up to 10 minutes, for thorough cleaning.
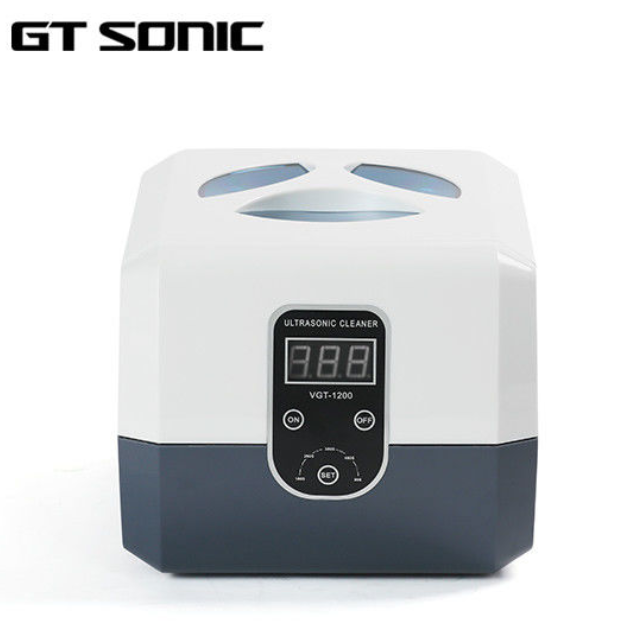
Key Features of GT-F6 Ultrasonic Cleaner for Dental Practices
|
Detail Information
|
Specifications
|
|
Place of Origin
|
China
|
|
Capacity
|
750 ml
|
|
Frequency
|
40 kHz
|
|
Power (W)
|
35 W
|
|
Certification
|
FCC, CE, GS, RoHS
|
|
Warranty
|
One Year
|
|
Application
|
Dental Clinics, Medical, Jewelry
|
|
Supply Ability
|
3000 Pcs Per Day
|
|
Tank Size
|
150 x 130 x 50 mm
|
|
High Light
|
Ultrasonic denture cleaner, automatic denture cleaner
|
The GT-F6 model from GT Ultrasonic Cleaner is specifically designed to meet the needs of dental practices. Here are some key features:
1.Adjustable Settings: The GT-F6 allows for precise control of both cleaning time and temperature. This ensures that dental tools receive the optimal level of cleaning based on the material and degree of soiling.
2.Large Capacity: The GT-F6 features a large tank that can accommodate multiple dental tools at once, making it ideal for busy dental practices that need to clean a high volume of instruments.
3.High-Frequency Ultrasonic Waves: The GT-F6 uses advanced ultrasonic technology to generate high-frequency waves, ensuring efficient and thorough cleaning even for hard-to-reach areas on dental instruments.
4.Durability and Reliability: Built to withstand frequent use in a clinical environment, the GT-F6 is made from durable, high-quality materials, ensuring it can handle the demands of daily dental practice.
5.User-Friendly Interface: With a simple and intuitive control panel, the GT-F6 makes it easy to set the required cleaning parameters and start the cleaning cycle quickly.
Product Description of Ultrasonic Dental Cleaning Machine
|
Specification
|
Details
|
|
Model
|
GT-F6
|
|
Tank Material
|
SUS304
|
|
Tank Size
|
150 x 130 x 50 mm
|
|
Overall Size
|
175 x 155 x 100 mm
|
|
Ultrasonic Power
|
40 kHz
|
|
Capacity
|
750 ml
|
|
Time Setting
|
180S, 280S, 380S, 480S, 90S
|
|
Output Power
|
35 W
|
|
Power Supply
|
AC100~120V, 60Hz / AC200~240V, 50Hz
|
Features:
1. Minimalist design: It is small in size, highly reliable in operation and automation.
2. 5 cycle digital timer: 180s-280s-380s-480s-90s. The timer has count down function, and the default working time is 180 seconds.
3. Transparent cover with perfect visibolity: It is easy to see the whle process od removing dirty.
4. The most cost effective model ever
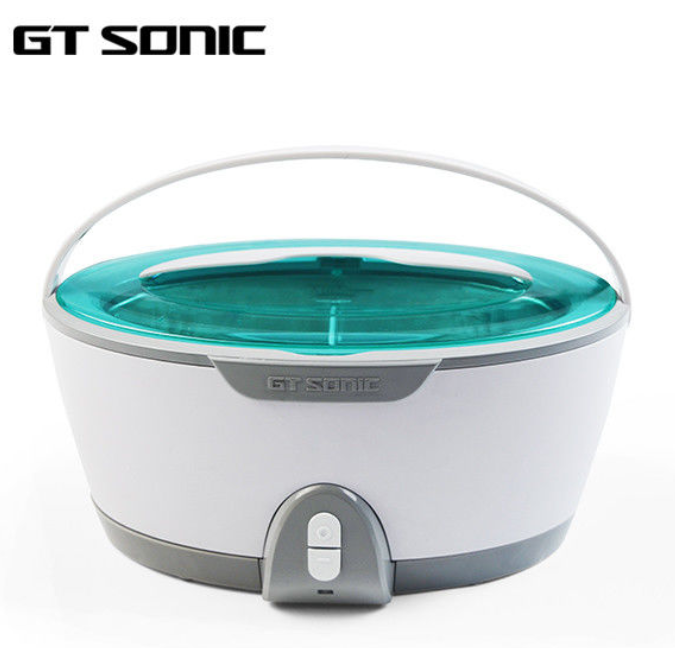
The GT-F6 Ultrasonic Cleaner is an all-in-one cleaning solution for dental clinics. It is capable of cleaning a wide range of dental instruments, including dental scalers, probes, mirrors, and forceps. With its large tank and customizable settings, it allows dental practices to maintain strict hygiene standards while saving time on manual cleaning processes.
What is the Benefit of Using an Ultrasonic Cleaner for Dental Instruments?
There are numerous advantages to using an ultrasonic cleaner in dental practices:
1.Efficient Cleaning: Ultrasonic cleaners remove dirt, bacteria, and debris more efficiently than manual cleaning, ensuring that dental tools are thoroughly sanitized.
2.Time-Saving: Ultrasonic cleaning is much faster than traditional manual cleaning methods, allowing dental staff to focus more on patient care.
3.Instrument Longevity: By using a more gentle and thorough cleaning method, ultrasonic cleaning reduces the wear and tear on dental instruments, increasing their lifespan.
4.Improved Hygiene: Ultrasonic cleaners reach all areas of dental instruments, ensuring that they are free from contamination, which is crucial in maintaining patient safety.
How Do You Maintain an Ultrasonic Cleaner?
Maintaining an ultrasonic cleaner is essential to ensure its longevity and optimal performance. Here are some key maintenance tips:
What is the Maintenance of Ultrasonic Scalers?
Ultrasonic scalers, like ultrasonic cleaners, require periodic maintenance. Regularly clean the scaling tips, check for wear, and calibrate the unit to ensure it operates efficiently. Always refer to the manufacturer’s instructions for proper maintenance schedules.
How Often Should the Water Be Drained from a Dental Ultrasonic Cleaner?
It is recommended to drain the ultrasonic cleaner after each use to prevent the buildup of contaminants in the cleaning solution. If the ultrasonic cleaner is used daily, change the cleaning solution every 1-2 days to maintain its effectiveness.
How Often Should You Change the Ultrasonic Cleaner?
The ultrasonic cleaner itself does not need to be replaced frequently. However, periodic checks for wear and tear are necessary. If you notice issues such as inconsistent cleaning results or malfunctioning controls, it may be time to replace parts or consider upgrading the unit.
Common Issues and Troubleshooting of Ultrasonic Dental Cleaner
How to Validate an Ultrasonic Cleaner?
To validate the performance of an ultrasonic cleaner, use an air cleaning test. Fill the tank with clean water and run the cleaner. Look for uniform bubble formation and ensure the entire surface of the cleaning solution is active. If there are areas with fewer bubbles, it could indicate an issue with the ultrasonic transducers.
How Do I Unclog an Ultrasonic Cleaner?
Clogging in an ultrasonic cleaner is rare, but it can happen if cleaning solution is not changed regularly or if debris builds up in the machine. To unclog it, clean the filter and the tank thoroughly, ensuring no blockages are present. If the issue persists, inspect the ultrasonic transducers for damage.
How to Make Ultrasonic Cleaner Work Better?
To improve the performance of your ultrasonic cleaner, make sure to regularly change the cleaning solution, clean the tank, and adjust the time and temperature settings according to the type of instruments being cleaned. Regular maintenance is key to keeping your ultrasonic cleaner working at peak performance.
Conclusion
The GT Ultrasonic Cleaner, especially the GT-F6, is an essential tool for any modern dental practice. It ensures that dental instruments are cleaned quickly, thoroughly, and efficiently, providing better hygiene for your patients and extending the lifespan of your tools. By following the correct cleaning procedures and maintaining the ultrasonic cleaner properly, dental professionals can ensure optimal results and a safer, more effective practice.
Learn More :
1.GTSONIC Ultrasonic Cleaner for Dental Instruments: Ideal for Clinics and Laboratories
2.Why Choose the GT-X3 Ultrasonic Dental Cleaner for Your Practice
3.Five Best Ultrasonic Retainer Cleaners Recommended


