Can Ultrasonic Cleaners Be Used for PCB and Electronic Components in Labs?
Author: Zoey
Date: 2026-06-24
Read: 5min
Quick Answer
Yes, ultrasonic cleaning can be used for some PCB boards and electronic components in laboratory workflows, but it is not suitable for every electronic assembly. It works best for compatible boards that need flux residue, dust, particles, light oils, or surface contamination removed, and only when the cleaning liquid, cycle time, temperature, and drying process are carefully controlled.
The most important rule is simple: never power a PCB before it is completely dry, and never assume all electronic components can be safely immersed.
Summary
PCB ultrasonic cleaning can help labs clean prototype boards, reworked assemblies, small electronic parts, and selected components more consistently than manual brushing. However, sensitive parts such as batteries, displays, microphones, speakers, MEMS sensors, relays, unsealed switches, and moisture-trapping components may be damaged by liquid or ultrasonic vibration.
For safe results, labs should check component compatibility, use an electronics-safe ultrasonic PCB cleaner liquid, avoid excessive heat, start with short cleaning cycles, rinse properly when required, and dry the PCB completely before testing.
What Is an Ultrasonic PCB Cleaner?
An ultrasonic PCB cleaner is a cleaning machine used to remove contamination from compatible printed circuit boards and selected electronic parts. It uses ultrasonic cavitation in a cleaning liquid to loosen residue from solder joints, board surfaces, gaps, and small component areas.
How Does PCB Ultrasonic Cleaning Work?
PCB ultrasonic cleaning works by sending high-frequency sound waves through a liquid. These waves create microscopic cavitation bubbles that form and collapse rapidly near the board surface.
This action can help remove flux residue, dust, fingerprints, small particles, and light oils. For laboratory testing, repair, R&D prototyping, and small-batch board cleaning, this method can be more consistent than manual brushing.
What Can an Ultrasonic Cleaner Remove from Circuit Boards?
An ultrasonic cleaner for electronic components can remove surface contamination such as rosin flux residue, water-soluble flux residue, particles, dust, light grease, and some residues left after soldering or rework.
However, ultrasonic cleaning does not repair corrosion, burned components, broken solder joints, or electrical failure. It is only a cleaning method, not a PCB repair solution.
Is Ultrasonic Cleaning Safe for Electronics?
Ultrasonic cleaning is safe only for electronics that are compatible with immersion, vibration, cleaning chemistry, and drying. Some circuit boards are good candidates, while others should not be placed in an ultrasonic bath.
Which PCB Boards Are Better Candidates?
Bare PCBs, prototype boards, simple soldered assemblies, and boards designed for cleaning are usually better candidates. These boards should not include batteries, powered circuits, or components that easily trap liquid.
In many lab workflows, ultrasonic cleaning PCB assemblies is most suitable after soldering, rework, or flux removal, especially when the board can be fully dried before inspection or power-on testing.
Which Electronic Components Should Be Avoided?
Some components should be avoided because liquid, vibration, or trapped moisture may damage them.
|
Component or Part
|
Main Risk
|
|
Batteries
|
Leakage, safety risk, damage
|
|
Displays
|
Moisture ingress, delamination
|
|
Microphones / speakers
|
Vibration and liquid damage
|
|
MEMS sensors
|
Mechanical sensitivity
|
|
Relays / switches
|
Liquid trapped inside
|
|
Crystal components
|
Possible vibration sensitivity
|
|
Unsealed connectors
|
Difficult drying
|
|
Powered electronics
|
Short circuit risk
|
Ultrasonic Cleaner for PCB: When Is It Suitable?
An ultrasonic cleaner for PCB is suitable when the board can be safely immersed and dried, and when the contamination is removable by ultrasonic cleaning. It is often used for flux residue, particles, and light contamination after soldering or rework.
When Does Ultrasonic PCB Cleaning Make Sense?
Ultrasonic PCB cleaning makes sense when manual cleaning is inconsistent, when residues remain under component edges, or when multiple small boards need a repeatable cleaning process.
For labs working with test boards or small electronic assemblies, a controlled ultrasonic process can improve cleanliness and reduce manual handling.
When Should You Avoid Ultrasonic Cleaner PCB Cleaning?
You should avoid ultrasonic cleaner PCB cleaning when the board includes sealed cavities, sensitive sensors, displays, batteries, acoustic components, or parts that cannot be fully dried.
If the component list is unknown, test one sample board first instead of cleaning a full batch.
How Does Ultrasonic Cleaning Work for Circuit Boards?
Ultrasonic cleaning works for circuit boards by helping the cleaning liquid reach solder joints, leads, board edges, small holes, and narrow gaps. Cavitation can loosen contamination from areas that are difficult to reach with a brush.
Why Is Cavitation Useful for PCB Cleaning?
Cavitation is useful because it creates microscopic cleaning action around the board surface. This can help remove flux residue near solder joints and particles around component leads.
A laboratory ultrasonic cleaner for PCB cleaning is helpful when labs need a consistent method for prototype boards, repair samples, or repeated small-batch cleaning.
Why Can Cavitation Also Be Risky?
Cavitation can be risky because strong ultrasonic energy may stress delicate components, weak solder joints, or fragile structures. Long cleaning time or excessive ultrasonic power can increase the risk.
For this reason, PCB ultrasonic cleaning should begin with conservative settings, short cycles, and careful inspection.
What Are the Best Ultrasonic Cleaners for Electronics?
The best ultrasonic cleaners for electronics are machines with suitable tank size, stable ultrasonic output, digital timer control, basket support, and safe temperature control. The goal is not maximum power, but controlled and repeatable cleaning.
What Features Matter in a PCB Ultrasonic Cleaner?
A PCB ultrasonic cleaner should allow the board to fit without bending, touching the tank bottom, or crowding other items. Digital time control is useful because electronic cleaning should not rely on guesswork.
|
Feature
|
Why It Matters
|
|
Digital timer
|
Prevents over-cleaning
|
|
Suitable tank size
|
Allows full board immersion
|
|
Cleaning basket
|
Keeps PCB away from tank bottom
|
|
Stable ultrasonic output
|
Supports repeatable cleaning
|
|
Temperature control
|
Helps avoid overheating
|
|
Drainage on larger tanks
|
Makes liquid replacement easier
|
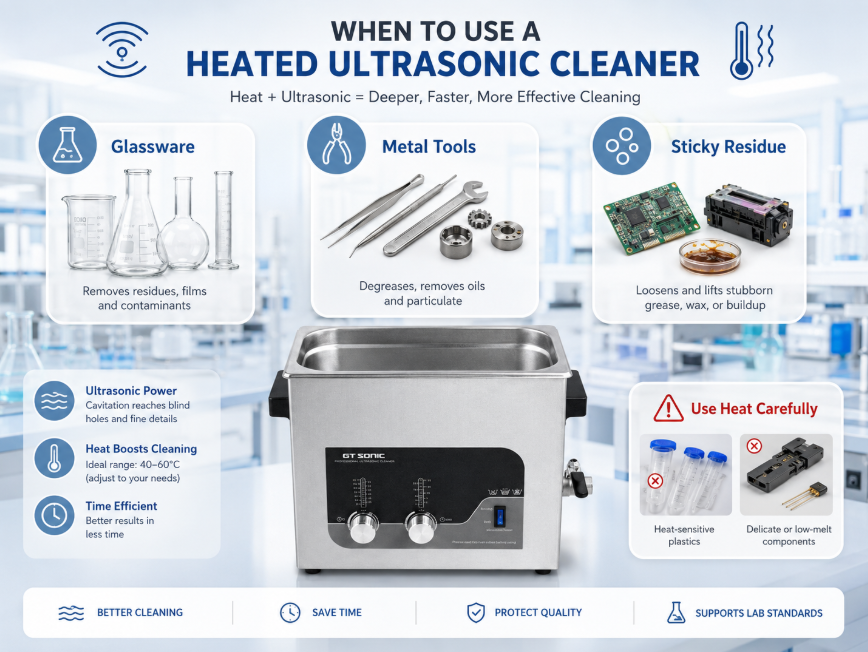
Should You Use a Heated Ultrasonic Cleaning Machine for PCB?
A heated ultrasonic cleaning machine may help remove oily residue or certain flux contamination, but heat should be used carefully with electronics. High temperature may damage plastics, labels, adhesives, coatings, or moisture-sensitive components.
For many PCB cleaning workflows, room temperature or mild warmth is safer than aggressive heating.
Ultrasonic PCB Cleaner Liquid: What Should You Use?
The ultrasonic PCB cleaner liquid should be compatible with electronics, solder mask, metals, plastics, connectors, and the residue being removed. The liquid should clean effectively, rinse cleanly, and leave no conductive residue.
Can You Use Plain Water for Cleaning PCB with Ultrasonic Cleaner?
Plain water may remove some water-soluble contamination, but it is usually not enough for flux, oils, or stubborn residues. DI water is preferred over tap water because it reduces mineral spots and ionic contamination.
Tap water can leave dissolved minerals behind, which may affect electrical testing after drying.
Is DIY Ultrasonic PCB Cleaning Solution a Good Idea?
A DIY ultrasonic PCB cleaning solution is risky if the formula is not tested for electronics compatibility. Household detergents, unknown chemicals, or aggressive cleaners may leave residue, corrode metals, or damage solder mask and components.
For laboratory work, it is safer to use an electronics-compatible cleaning solution with clear technical and safety information.
Can You Use IPA or Solvent in an Ultrasonic Tank?
IPA, alcohol, acetone, or other flammable solvents should not be poured directly into a standard ultrasonic tank. Flammable vapor can create fire and explosion risks, especially with heat, poor ventilation, or non-explosion-proof equipment.
For routine lab PCB cleaning, a compatible water-based electronics cleaning liquid is usually the safer starting point.
Cleaning PCB with Ultrasonic Cleaner: What Is the Basic Workflow?
Cleaning PCB with ultrasonic cleaner equipment should follow a controlled workflow. The board should be powered off, batteries removed, compatibility checked, and drying planned before cleaning begins.
|
Step
|
Action
|
Purpose
|
|
1
|
Inspect the PCB
|
Identify sensitive parts
|
|
2
|
Remove battery or power source
|
Avoid electrical risk
|
|
3
|
Choose compatible cleaner liquid
|
Match residue and material
|
|
4
|
Place PCB in a basket
|
Avoid direct tank contact
|
|
5
|
Run a short cleaning cycle
|
Reduce vibration exposure
|
|
6
|
Rinse with DI water if needed
|
Remove cleaner residue
|
|
7
|
Dry completely
|
Prevent corrosion or short circuit
|
|
8
|
Inspect before power-on
|
Confirm board condition
|
How Long Should PCB Ultrasonic Cleaning Take?
PCB ultrasonic cleaning time should be as short as possible while still achieving the required cleanliness. Many labs start with a short cycle and adjust based on residue level, board complexity, and cleaning result.
Longer cleaning time is not always better. Over-cleaning may increase the risk of trapped moisture or component stress.
Should PCBs Be Placed Directly on the Tank Bottom?
PCBs should not be placed directly on the tank bottom. A basket or holder helps protect the board and improves liquid circulation around the surface.
Direct contact with the tank bottom can reduce cleaning efficiency and may damage both the PCB and the ultrasonic tank.
How to Dry PCB After Ultrasonic Cleaning?
A PCB must be completely dry after ultrasonic cleaning before it is tested or powered. Drying is one of the most critical steps because liquid trapped under components can cause corrosion, leakage current, or short circuits.
What Is the Best Drying Process for PCB Boards?
A good drying process includes draining, DI water rinsing if needed, clean air blowing, and controlled drying. Boards should be positioned so liquid can escape from under components and connectors.
Clean compressed air or filtered air can help remove liquid from gaps. A low-temperature drying oven may be used only when the board and components are temperature-compatible.
How Do You Know a PCB Is Dry Enough?
A PCB is dry enough only when no liquid remains under components, connectors, shields, or board openings. Visual dryness is not always enough because moisture can hide under low-clearance parts.
Before power-on testing, inspect the board carefully and allow enough drying time.
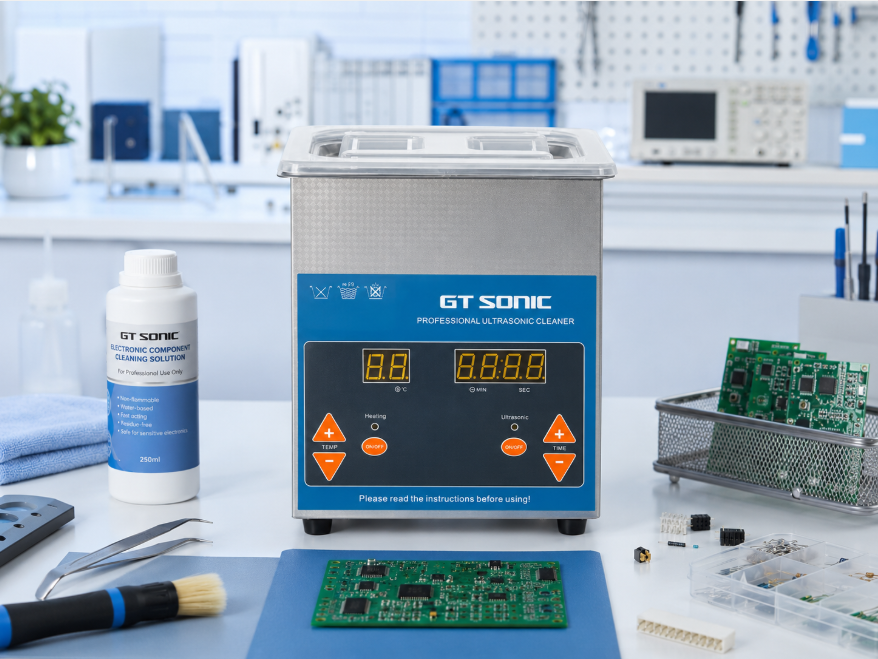
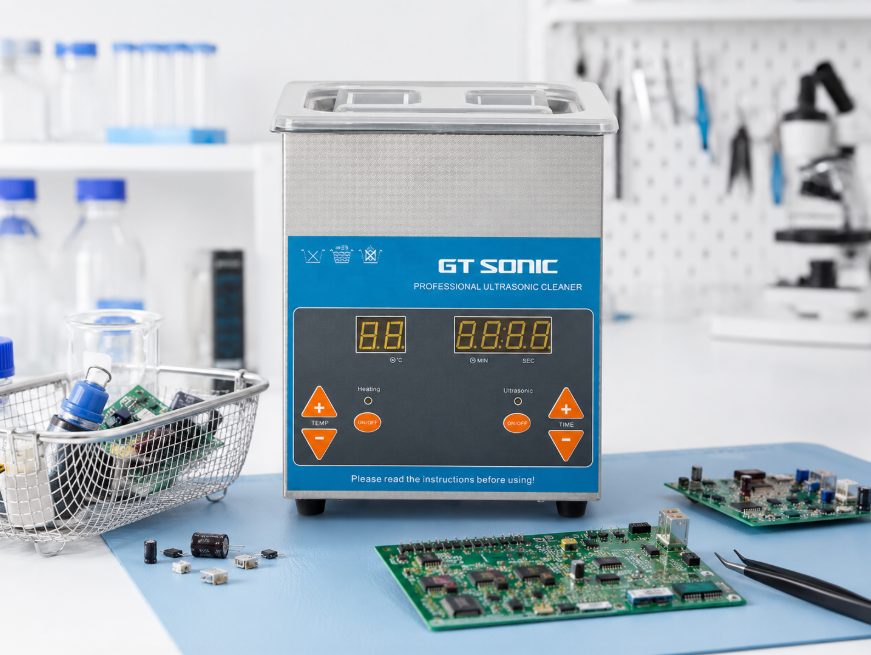
What Is the GT SONIC Equipment Best Used for in Electronics Cleaning?
GT SONIC equipment can support compatible laboratory cleaning tasks such as PCB cleaning, selected electronic components, small tools, metal parts, and glassware when the process is controlled. It is suitable for labs that need stable cleaning cycles, proper tank capacity, basket use, and repeatable operation.
Can GT SONIC Support PCB and Electronic Component Cleaning?
GT SONIC ultrasonic cleaning equipment can be used for PCB and electronic component cleaning when the board design, component compatibility, cleaning liquid, temperature, and drying process are properly evaluated.
For electronics labs, the focus should be process safety rather than only cleaning strength. The correct model should support the board size, cleaning workload, and control requirements of the actual application.
What Should Labs Confirm Before Choosing a Model?
Labs should confirm PCB dimensions, component sensitivity, residue type, cleaning liquid compatibility, drying method, and required batch size before choosing equipment.
A suitable ultrasonic PCB cleaning machine should match the workflow rather than simply offering the largest tank or highest output.
Common Mistakes in Ultrasonic Cleaning PCB Assemblies
The most common mistakes are cleaning unsuitable electronics, using the wrong liquid, applying too much heat, cleaning for too long, and powering the board before it is fully dry.
Mistake 1: Cleaning Every Electronic Board the Same Way
Not every PCB assembly should be cleaned ultrasonically. Boards with sensitive components, sealed cavities, batteries, displays, or moisture-trapping parts may need another cleaning method.
Mistake 2: Using the Wrong Cleaner Liquid
The wrong cleaner liquid may leave residue, cause corrosion, or damage materials. Electronics cleaning should use compatible solutions and proper rinsing.
Mistake 3: Skipping the Drying Step
Skipping drying is one of the biggest risks. Even if the board looks clean, trapped moisture can remain under components and cause failure after power-on.
FAQ About Ultrasonic PCB Cleaning
1.What Are the Best Ultrasonic Cleaners for Electronics?
The best ultrasonic cleaners for electronics are models with suitable tank size, digital timer control, stable ultrasonic output, basket support, and safe temperature control.
2.Is Ultrasonic Cleaning Safe for Electronics?
Ultrasonic cleaning is safe only for compatible electronics. Sensitive parts such as batteries, displays, microphones, speakers, MEMS sensors, relays, and unsealed switches may not be suitable.
3.How Does Ultrasonic Cleaning Work for Circuit Boards?
Ultrasonic cleaning works by using cavitation bubbles in a cleaning liquid to loosen flux, dust, oils, and particles from PCB surfaces and solder joints.
4.Can I Use an Ultrasonic Cleaner for PCB Board Cleaning?
Yes, you can use an ultrasonic cleaner for PCB board cleaning if the board and components are compatible with immersion cleaning and the drying process is properly controlled.
5.What Liquid Should I Use in an Ultrasonic PCB Cleaner?
Use an electronics-compatible ultrasonic PCB cleaner liquid. DI water or a water-based electronics cleaning solution is usually preferred over tap water or unsafe solvents.
6.Is DIY Ultrasonic PCB Cleaning Solution Safe?
DIY ultrasonic PCB cleaning solution is not recommended unless the formula is tested for electronics. Unknown cleaners may leave residue or damage PCB materials.
7.How Do You Dry PCB After Ultrasonic Cleaning?
Dry the PCB by draining, rinsing if needed, using clean air to remove trapped liquid, and applying controlled low-temperature drying if the components allow it.
8.Can a Benchtop Ultrasonic Cleaner Clean PCB Assemblies?
A benchtop ultrasonic cleaner can clean small PCB assemblies if the board fits the tank and the components are suitable for ultrasonic cleaning.
Conclusion
Ultrasonic cleaning can be used for PCB and electronic components in labs, but only when the process is controlled. PCB ultrasonic cleaning is useful for removing flux residue, dust, particles, oils, and light contamination from compatible boards, but it is not safe for every electronic assembly.
The key factors are component compatibility, suitable ultrasonic PCB cleaner liquid, conservative time and temperature settings, proper rinsing, and complete drying before power-on. For laboratory users, a benchtop ultrasonic cleaner for PCB and electronics can improve repeatability when used according to a safe workflow.
GT SONIC ultrasonic cleaning equipment can support compatible PCB and electronics cleaning applications when users select the right tank size, cleaning solution, drying method, and operating process for their actual lab work.


