An ultrasonic retainer cleaner can help loosen residue from narrow grooves, tooth-shaped recesses and other areas that are difficult to reach by hand. However, completing one cleaning cycle does not guarantee that an older retainer will immediately become clear, smooth and odor-free.
A retainer may still look cloudy, smell unpleasant or feel gritty because of hardened buildup, unsuitable cleaning conditions, poor positioning in the tank, incomplete rinsing, an unclean storage case or changes in the retainer material itself.
Running the retainer cleaner for longer is not always the right solution. Understanding how ultrasonic cleaners work can help you identify the visible problem, check the cleaning process and determine whether the issue is removable buildup or a physical change in the appliance.
This guide applies primarily to removable clear retainers, clear aligners and similar dental appliances. Fixed retainers attached behind the teeth require a different cleaning routine. Retainer materials and care requirements also vary, so the instructions provided by your orthodontist, retainer supplier and ultrasonic cleaner manufacturer should always take priority.
Quick Answer: Why Is My Retainer Still Dirty After Ultrasonic Cleaning?
The most common possibilities are:
- The buildup has hardened over time.
- The cleaning water or solution needs to be replaced.
- Part of the retainer is blocked, stacked or holding an air bubble.
- The ultrasonic tank or storage case is reintroducing odor.
- The retainer was not rinsed thoroughly after cleaning.
- Cloudiness may come from scratches, wear or material aging rather than removable surface residue.
- The appliance is cracked, warped or no longer fitting properly.
Instead of immediately adding another long cleaning cycle, inspect the retainer, empty and clean the tank, use fresh water, reposition the appliance and run the standard cycle recommended for your machine.
The American Association of Orthodontists lists ultrasonic cleaning as one possible option for retainer care. It also emphasizes routine rinsing, gentle cleaning and following the care requirements for the specific appliance.
Identify the Problem Before Running Another Cleaning Cycle
“Still dirty” can describe several different results. Examining the specific symptom makes troubleshooting more effective than repeatedly extending the cleaning time.
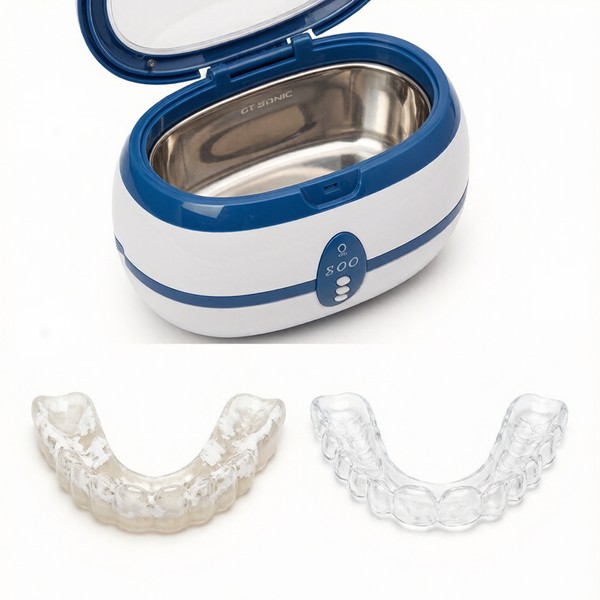
The Retainer Still Smells
A smelly retainer after ultrasonic cleaning does not automatically mean that the machine has failed.
The odor may be related to:
- Long-standing residue on the appliance;
- Used cleaning water left in the tank;
- Incomplete rinsing;
- Moisture remaining after cleaning;
- Residue inside the ultrasonic chamber;
- A damp or unclean storage case.
Pay attention to when the smell returns. If the retainer smells clean immediately after washing but develops an odor after storage, the case or drying process may be contributing to the problem.
Ultrasonic cleaning should also not be confused with sterilization. The U.S. Centers for Disease Control and Prevention explains that ultrasonic equipment is used to remove debris before separate disinfection or sterilization procedures in dental settings. Ultrasonic action supports physical cleaning, but it should not automatically be presented as sterilization.
The Retainer Looks Cloudy or Milky
A cloudy retainer may have:
- A thin surface film;
- White mineral-like deposits;
- Fine scratches;
- Fixed staining;
- Areas of material wear;
- Heat-related distortion;
- Changes caused by long-term use.
Check whether the cloudy area changes after rinsing and a correctly completed ultrasonic cleaning cycle. If the same opaque area remains in exactly the same location, the appearance may be related to scratching, wear or changes within the plastic rather than removable surface residue.
Cleaning methods can also affect clarity. The American Association of Orthodontists’ retainer-care guidance advises avoiding abrasive toothpaste because it can leave small scratches on some retainer surfaces.
There Is White or Chalky Buildup
White deposits commonly appear around:
- Edges;
- Tooth-shaped recesses;
- Wire-and-acrylic junctions;
- Areas where saliva collects;
- Sections that are difficult to rinse.
Recent, soft residue is generally easier to loosen than deposits that have remained on the appliance for a long time. An ultrasonic cleaner for retainers may help release accessible buildup, but it may not remove every hardened deposit during one standard cycle.
Avoid responding by adding stronger concentrations or mixing several household cleaners. The cleaning product must be compatible with both the retainer material and the ultrasonic machine.
The Surface Feels Gritty or Rough
A gritty texture may indicate:
- Hardened residue;
- Debris trapped in recesses;
- Fine surface scratches;
- Material wear;
- A combination of buildup and surface damage.
If a rough area remains fixed after correct ultrasonic retainer cleaning, inspect it carefully for scratching, cracking, sharp edges or changes in the plastic.
The Retainer Has Yellow or Brown Areas
Discoloration may be connected to:
- Food or drink pigments;
- Long-term residue;
- Material aging;
- Unsuitable cleaning products;
- Inconsistent daily rinsing.
Ultrasonic action can help remove accessible surface debris, but it cannot guarantee that permanent staining or material discoloration will disappear.
The objective should be to maintain a clean, undamaged and properly fitting appliance—not to use increasingly aggressive cleaning methods simply to restore a brand-new appearance.
Retainer Cleaning Troubleshooting Table
| What You Notice |
Possible Cause |
What to Check First |
| Odor remains after cleaning |
Old residue, dirty tank, poor rinsing or an unclean case |
Replace the water and clean the tank and case |
| Retainer looks cloudy |
Film, deposits, scratches or material aging |
Check whether the cloudiness changes after rinsing |
| White buildup remains |
Hardened deposits |
Consider how long the buildup has been present |
| Only one area remains dirty |
Poor positioning or trapped air |
Reposition the retainer in the tank |
| Surface feels gritty |
Deposits or surface damage |
Inspect for scratches, cracks and fixed rough areas |
| Yellow or brown staining remains |
Pigment or material change |
Determine whether the color appears to be on or within the material |
| Odor returns after storage |
Damp or contaminated storage case |
Clean and dry the case before reuse |
| Retainer no longer fits properly |
Warping, damage or tooth movement |
Stop treating it as a cleaning issue and contact the provider |
Why an Ultrasonic Retainer Cleaner May Not Fully Remove the Problem
1. The Buildup Has Been Left Too Long
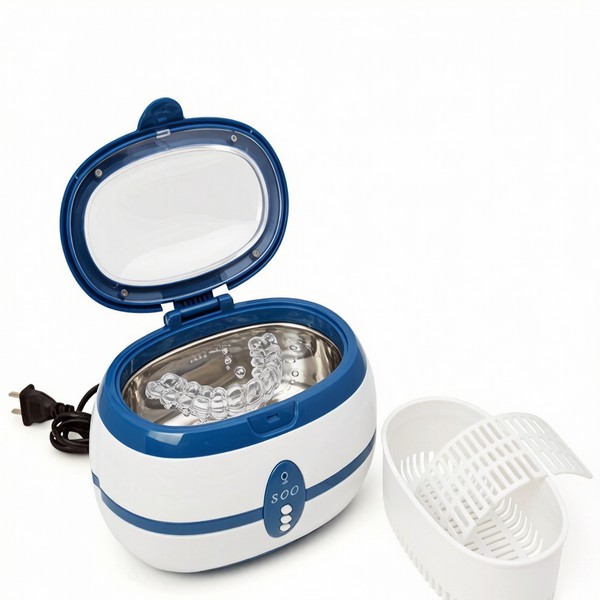
An ultrasonic cleaner transfers high-frequency energy through liquid, producing cavitation that helps loosen contamination from exposed surfaces and recessed details.
However, ultrasonic action does not make every deposit instantly removable. It is important to distinguish between:
- Recent surface residue that can be loosened;
- Hardened buildup that may require further assessment;
- Permanent staining or material changes that cannot be washed away;
- Structural damage that requires professional attention.
A heavily accumulated retainer may become cleaner without returning to its original appearance. Regular rinsing helps prevent saliva and debris from drying on the appliance and becoming more difficult to remove later.
2. The Cleaning Water Needs to Be Replaced
Running several cycles in the same cloudy water is a common troubleshooting mistake.
After a cycle, the liquid may contain residue released from the retainer. Replacing it with fresh water provides a cleaner environment for the next cycle and makes the result easier to evaluate.
Do not leave used water sitting in the dental pod cleaner unless the product instructions specifically permit it. Empty and rinse the tank after use, following the equipment manufacturer’s maintenance guidance.
3. The Cleaning Solution Is Unsuitable or Used Incorrectly
A compatible retainer cleaning solution may support the ultrasonic cleaning process when permitted by the appliance and cleaner instructions. For guidance on which items and solutions are safe to use, see what you can put in an ultrasonic cleaner.
Problems can occur when users:
- Add too much concentrate;
- Use a chemical unsuitable for the appliance;
- Mix several cleaning products;
- Reuse old solution;
- Assume that a stronger concentration will clean better;
- Fail to rinse the retainer afterward.
Care instructions differ according to retainer material and construction. The American Association of Orthodontists recommends gentle cleaning products and warns against harsh chemicals that may damage the appliance or leave unsuitable residues.
For that reason, do not apply one homemade formula to every clear retainer, wire retainer, aligner or mouthguard. Follow the instructions supplied with the specific dental appliance.
4. The Retainer Is Positioned Incorrectly
Cleaning may be uneven when:
- Two retainers are stacked;
- One surface is pressed against another item;
- A curved section traps air;
- The appliance is not adequately submerged;
- Too many objects are placed in the tank;
- A deep recess does not fill with liquid.
The cleaning liquid must reach the surface being treated. Repositioning the appliance may therefore be more useful than immediately extending the cleaning time.
For a small ultrasonic cleaner for aligners, avoid crowding the chamber with jewelry, glasses or unrelated items during the same cycle. Release visible air pockets and keep the appliance within the recommended water level.
5. The Tank or Storage Case Is Reintroducing Odor
The retainer is only one part of the cleaning routine.
Odor may return when a freshly cleaned appliance is placed in:
- A damp case;
- A case containing old residue;
- A closed container that has not dried;
- A case that is rarely cleaned.
The ultrasonic tank may create a similar problem when old water or residue remains inside.
When a retainer cleaning machine appears to work temporarily but the odor quickly returns, inspect the complete cleaning, rinsing, drying and storage process instead of focusing only on the ultrasonic cycle.
6. The Retainer Material Has Changed
Not every cloudy or rough area is removable buildup.
The appearance may be related to:
- Fine scratches;
- Permanent staining;
- Worn surfaces;
- Cracks;
- Warping;
- Damaged edges;
- A change in fit.
Very hot water is particularly unsuitable for many plastic retainers because excessive heat can alter their shape. Both the American Association of Orthodontists and University Hospitals Plymouth NHS Trust advise against cleaning plastic retainers with hot water because of the risk of distortion.
A Step-by-Step Troubleshooting Process
Follow this sequence before deciding that the ultrasonic retainer cleaner is not working.
Step 1: Inspect the Retainer for Damage
Before another cycle, look for:
- Cracks;
- Warped sections;
- Sharp or broken edges;
- Loose metal components;
- Permanent rough areas;
- Changes in how the retainer fits.
Cleaning is not a repair method. A cracked, distorted or poorly fitting appliance should be assessed by the orthodontist or dental provider responsible for it. Retainers are designed to maintain the corrected position of the teeth. The American Association of Orthodontists recommends professional guidance when a retainer becomes damaged or no longer fits as it previously did.
Step 2: Identify the Type of Problem
Ask:
- Is the main issue odor?
- Is there a removable film?
- Are the deposits hard and chalky?
- Is the discoloration fixed?
- Does the surface look scratched?
- Is the residue limited to one recess?
- Has the appliance changed shape or fit?
This prevents every symptom from being treated by simply adding more time or more cleaning solution.
Step 3: Empty and Check the Ultrasonic Tank
Discard the used liquid and inspect the tank for:
- Debris at the bottom;
- Residue around the waterline;
- An unpleasant smell;
- Solution left from a previous cycle.
Clean the chamber according to the manufacturer’s instructions before running another test.
Step 4: Add Fresh Water
Start the next cycle with clean water at a temperature permitted by both the retainer and equipment instructions. Avoid very hot water. Cool or lukewarm water is commonly recommended for removable retainers because excessive heat may distort some plastic materials.
Step 5: Check the Retainer Cleaning Solution
Before adding a tablet or liquid, confirm that:
- It is compatible with the retainer material;
- It is allowed in the ultrasonic machine;
- The concentration is correct;
- It has not been mixed with another product;
- The appliance will be rinsed afterward.
Do not automatically increase the concentration because a previous cycle produced limited improvement.
Step 6: Reposition the Retainer
Place the appliance so that:
- It is not stacked with another retainer;
- Inner recesses fill with liquid;
- Large air pockets are released;
- It does not block another item;
- It remains within the recommended water level;
- The tank is not overloaded.
This is especially important when only one area remains dirty while the rest of the appliance appears clean.
Step 7: Run the Standard Recommended Cycle
Use the cycle specified for the ultrasonic cleaner for retainers. A longer cleaning time will not correct:
- Dirty water;
- Incompatible solution;
- Poor positioning;
- Material aging;
- Structural damage.
Run the normal program first and evaluate the result before making another adjustment.
Step 8: Rinse and Inspect Again
After the cycle:
- Remove the retainer.
- Rinse it according to its care instructions.
- Check the affected area under good lighting.
- Compare whether it improved, remained unchanged or became worse.
- Empty and rinse the ultrasonic tank.
If the residue has softened or partly disappeared, another standard cycle may be reasonable when permitted by the appliance and equipment instructions. If nothing changes, repeatedly running the same program is unlikely to identify or solve the underlying problem.
Step 9: Clean and Dry the Storage Case
Before returning the retainer to storage:
- Remove visible residue from the case;
- Clean it using an appropriate method;
- Allow it to dry;
- Do not place a clean retainer into old moisture or debris.
This step is particularly important when investigating an odor that returns after storage.
Can You Run an Ultrasonic Retainer Cleaner Twice?
A second standard cycle may be reasonable when:
- The retainer is not cracked or warped;
- The first cycle produced some improvement;
- Fresh water is being used;
- The appliance has been repositioned;
- The cleaner instructions permit another cycle;
- The retainer provider has not given conflicting guidance.
Stop repeating cycles when:
- No improvement occurs;
- The appliance becomes rougher or cloudier;
- A crack or change in shape appears;
- The retainer no longer fits correctly;
- The deposit appears fixed within the material;
- You are unsure whether the cleaning solution is compatible.
The correct response to poor results is usually to change one relevant factor and reassess. Simply adding more time may repeat the same ineffective process. If you are choosing between a standard machine and a dedicated option, compare how a GT Sonic ultrasonic cleaner and dental pod perform for retainers and dentures before deciding.
Is It Retainer Buildup or Material Damage?
This comparison can support an initial check, but appearance alone cannot confirm whether a dental appliance is damaged.
Contact the orthodontic provider when the retainer is cracked, distorted, no longer fits or remains abnormal after appropriate care.
| More Likely to Be Surface Buildup |
More Likely to Be Material Change or Damage |
| Concentrated around edges and recesses |
Fixed cloudy areas across the plastic |
| Improves after rinsing or cleaning |
Remains unchanged after correct cleaning |
| Appeared gradually with visible residue |
Accompanied by scratches or roughness |
| Can be partly loosened |
Appears embedded in the material |
| Does not affect the appliance shape |
Includes cracking, warping or damaged edges |
| Retainer still fits normally |
Retainer feels tighter, looser or uneven |
When Ultrasonic Cleaning Is No Longer Enough
The Retainer Is Cracked or Warped
A damaged appliance should not be treated as a routine cleaning problem. Do not use hot water, prolonged cleaning or physical force in an attempt to restore its original shape.
The Retainer No Longer Fits
A noticeable change in fit may be connected to appliance damage or tooth movement. Because the purpose of a retainer is to maintain tooth position, this situation requires professional assessment rather than additional cleaning.
Hardened Deposits Remain
Old, fixed deposits may not disappear through a household ultrasonic cycle alone. Ask the dental provider whether the appliance can be professionally cleaned or whether replacement should be considered.
Cloudiness Does Not Change
Fixed cloudiness may result from scratches, wear or material changes. Continuing to run the clear aligner cleaner will not necessarily restore transparency.
Odor Returns Immediately
Check:
- The storage case;
- The ultrasonic tank;
- The rinsing process;
- The drying process;
- Whether cleaning water is being reused;
- Whether residue has accumulated for a long time.
If these factors have been corrected and the odor continues, seek professional advice.
How to Prevent the Same Problem from Returning
Rinse the Retainer Promptly
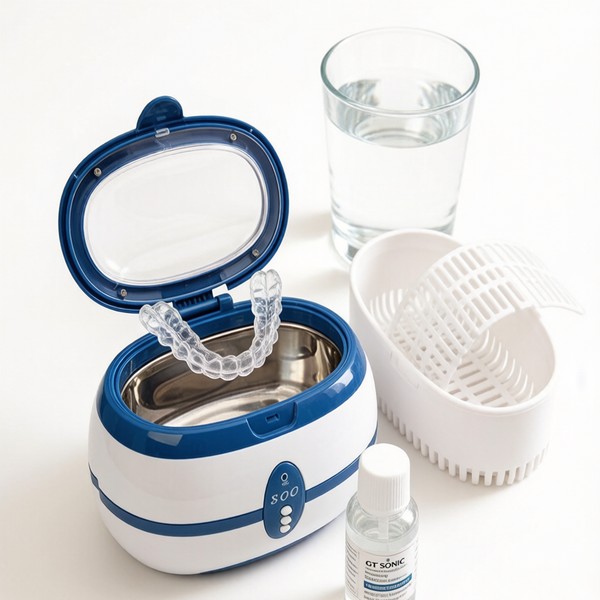
Rinsing the appliance after removal helps prevent saliva and residue from drying on the surface. The AAO recommends rinsing removable retainers with lukewarm water each time they are removed.
Replace Used Cleaning Water
Empty the tank after the ultrasonic cycle. Do not repeatedly clean appliances in liquid that already contains loosened residue.
Keep the Ultrasonic Tank Clean
Follow the equipment manufacturer’s maintenance instructions. Remove residue from the chamber and keep it dry between uses when required.
Clean the Storage Case
The case is part of the retainer-care process. Cleaning only the appliance while ignoring its case can allow odor and residue to return.
Avoid Very Hot Water
Use the water temperature permitted by the retainer and cleaning-device instructions. Hot water may distort certain removable plastic appliances.
Inspect More Than Cleanliness
Regularly check for:
- Cracks;
- Warping;
- Rough edges;
- Fixed cloudy areas;
- Loose components;
- Changes in fit.
A retainer can look clean while still showing signs of wear or damage that require attention.
Frequently Asked Questions
Why does my retainer still smell after ultrasonic cleaning?
The odor may be associated with old buildup, reused water, incomplete rinsing, residue in the ultrasonic tank or an unclean storage case. Replace the water, clean the tank and case, complete the normal cycle and rinse the retainer before evaluating the result.
Can I use only water in an ultrasonic retainer cleaner?
Some machines are designed to work with water, while others permit a compatible tablet or cleaning solution. Follow the operating instructions for the ultrasonic cleaner and the care instructions supplied with the retainer.
Can an ultrasonic cleaner remove white buildup from a retainer?
It may help loosen recent or accessible deposits. Long-standing hardened buildup may not disappear in one household cleaning cycle. Avoid compensating with unknown chemicals, excessive concentrations or unlimited cleaning cycles.
Why is my retainer cloudy even though it feels clean?
Cloudiness may be related to a remaining film, deposits, fine scratches, staining or material aging. If the same area remains unchanged after correct cleaning, it may not be removable surface residue.
Can I run my dental pod cleaner twice?
A second normal cycle may be considered when the retainer is undamaged, the first cycle produced improvement and the device instructions permit it. Replace the water and correct the positioning before running the machine again.
Does an ultrasonic retainer cleaner sterilize retainers?
Ultrasonic cleaning helps remove debris but should not automatically be described as sterilization. Cleaning, disinfection and sterilization are separate processes in dental infection-control guidance.
Can I clean clear aligners and retainers in the same machine?
A suitable ultrasonic dental appliance cleaner may accommodate different removable appliances, but material compatibility, tank capacity and care instructions should be checked first. For a clinic-focused view, review how dental clinics choose an ultrasonic cleaner for retainers. Do not assume that every clear aligner, retainer, mouthguard or wire appliance can use identical settings or cleaning solutions.
When should I stop cleaning and contact my orthodontist?
Seek professional advice when the retainer: is cracked or warped; has sharp or damaged edges; no longer fits correctly; has loose metal components; remains abnormal after appropriate cleaning; causes new discomfort.
Conclusion
When a retainer remains cloudy, smelly or gritty after ultrasonic cleaning, do not assume that the retainer cleaning machine simply needs to run longer.
Start by identifying the symptom. Inspect the appliance for damage, replace the water, review the cleaning solution, reposition the retainer and complete the standard cycle. Then rinse it, evaluate the result and clean both the ultrasonic tank and storage case.
A properly used ultrasonic cleaner for retainers can support the removal of accessible residue from detailed surfaces, but it cannot repair cracks, reverse warping or restore material that has permanently changed.
For help evaluating your cleaning setup, send GT SONIC the ultrasonic cleaner model, retainer type and a description of the problem. Our team can help review the operating conditions and recommend an appropriate ultrasonic cleaning approach.


